A NAT network issue is the common issue everyone will face while using VM VirtualBox for the first time.
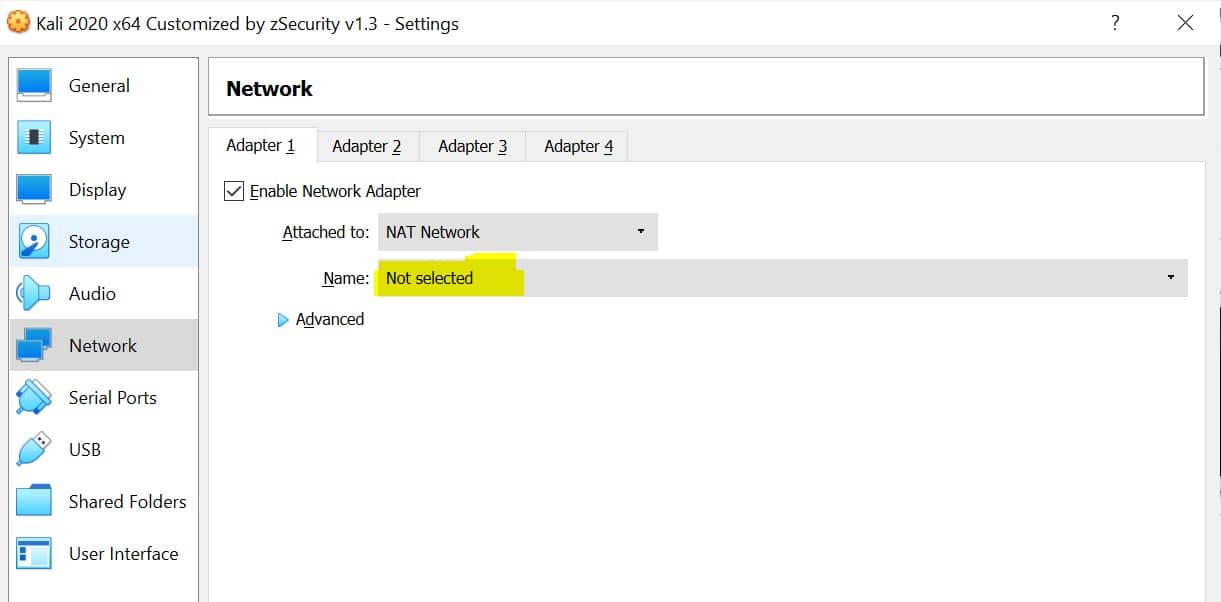
- The issue will be like NATnetwork Name shows Not Selected
For fixing this issue follow below steps.
- First Open VM VirtualBox
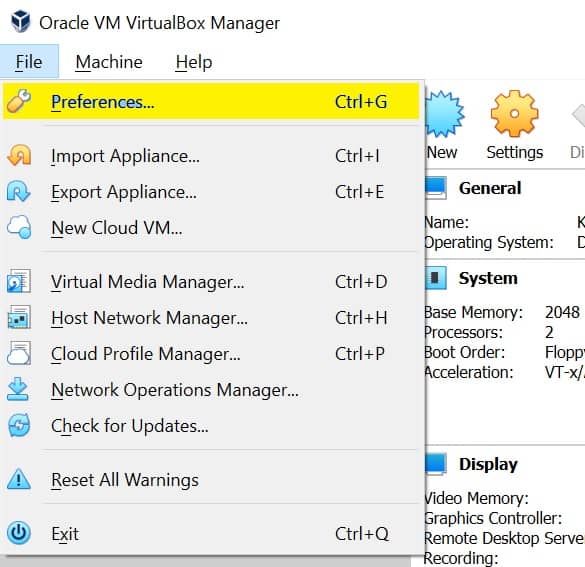
- Then click on File from top menu list and select Preferences.. option
- Now select Network option from left side list
- Then click on green + symbol on right side
- NatNetwork will create automatically on Network list
- Once you see that NatNetwork is present on list, then click ok
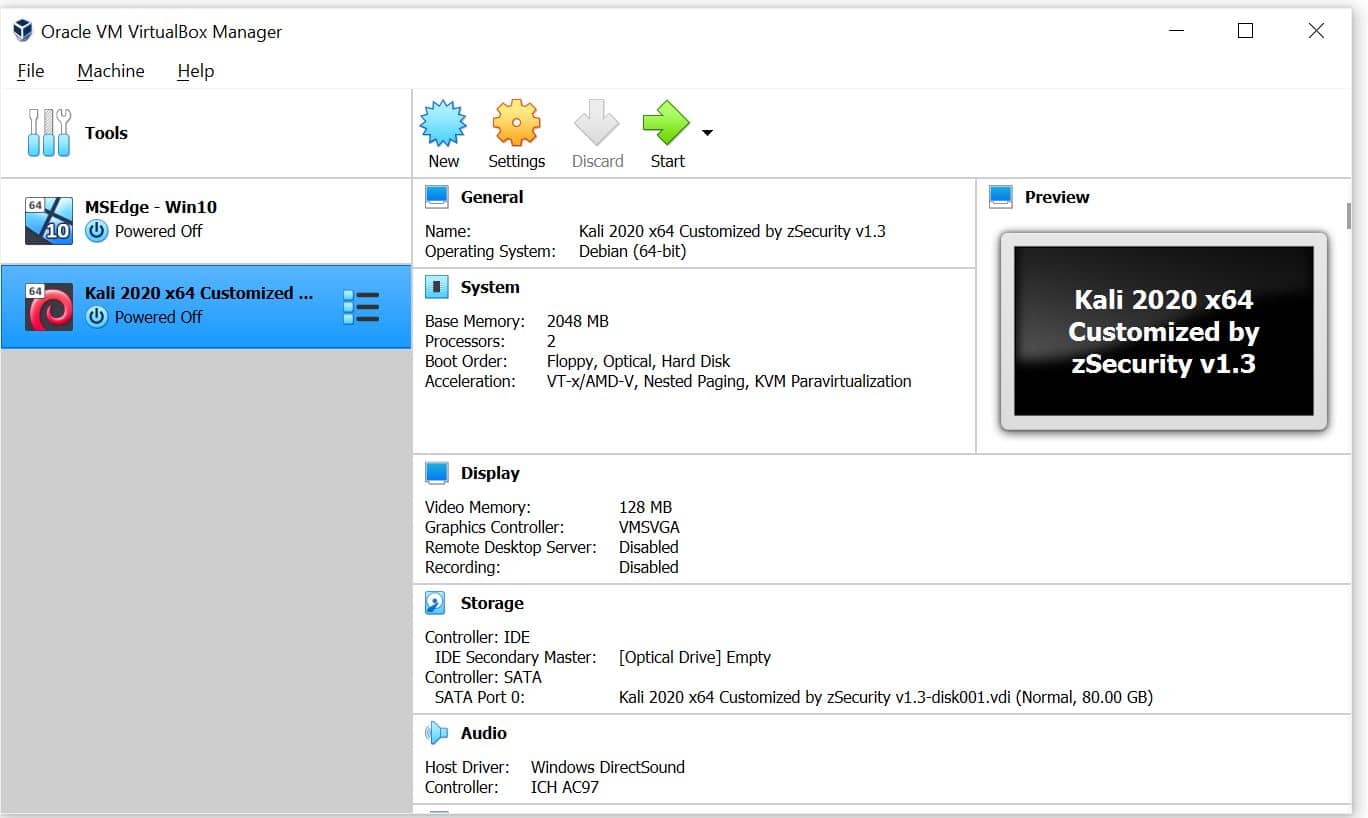
- Now select your Operating System(Kali Linux/ Windows 10 etc..) on left side of VirtualBox
- Then click on Settings option
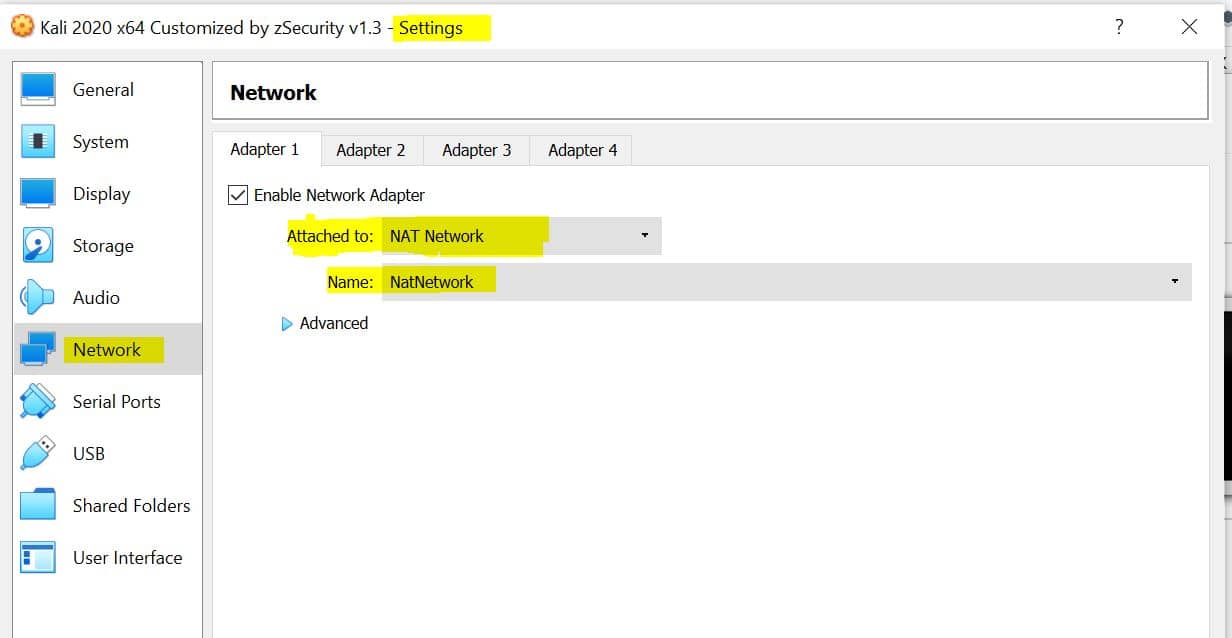
- Then go to Network option

- Select Enable Network Adapter check box
- Then Select NAT Network from dropdown list of Attached to
- NatNetwork will automatically display under Name section
- Click ok
- Now if you connect to Kali Linux/Windows, you are able to see the Network connection
[…] Click here to Know How To Fix Nat Network Issue In VM VirtualBox […]